By Christy Bassett, Homesteader at Barefoot All Natural Farm
Last month we talked about the process of hatching chicks at home. If you decided to take on the adventure of incubating eggs and hatching out chicks without the help of a mother hen, the next step is to set up your brooder and get ready to care for your new babies.
A brooder is a safe place where vulnerable newborns can live while they adjust to life outside the egg. Chicks (and most other poultry) are born fully capable of eating and drinking on their own and don’t need the guidance of a parent to survive. But they do need shelter and warmth.
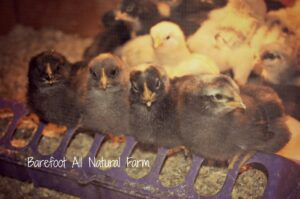
6 week old chicks in a half-sided makeshift brooder, ready to move outside.
You can find a range of options when it comes to choosing a ready to use brooder, from a simple plastic corral like this one, to a sturdy elevated house like this one. But since the basic idea is just to create an enclosed space that will keep warmth and chicks contained, it’s easy to make your own brooding space out of materials you have hanging around the house.
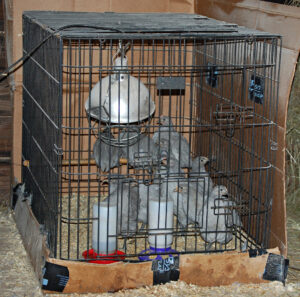
In the past we have used plywood boards to piece together a box, an old rabbit cage with a plastic bottom and plastic wrap around the sides, a wire dog crate with carboard buffer, and other odds and ends that can be scrapped together to resemble a container. These have all worked to some extent, but over the years we’ve found a few flaws in these hodgepodge set ups.
Floor/surface material
Chicks poop. A lot. And their poop is really a pee/poop mix, which makes it very wet, and anything that is porous will absorb said poop. Surfaces like plywood or cardboard are especially problematic when used as a brooder floor because they absorb bacteria readily, which can fester and cause mold or pathogens to multiply, especially in a warm enclosed space like the one we are encouraging in a brooder.
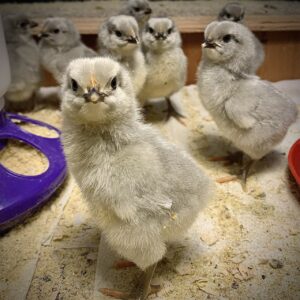
Newly hatched chicks on paper towels.
Plastic has been the easiest surface to keep clean for us, although I have also seen some setups that use a metal tray. The issue with these surfaces is that they are slippery. When chicks are young, they need stable ground with traction so that they can learn to stand and walk. If kept on a slippery surface, young chicks can develop splay leg, or “spraddle leg”. This happens when young chicks try to get their footing but repeatedly slide or slip and end up with a hip joint that is not properly aligned. If not treated, this can become a permanent deformity and lead to a short, painful life for the chicken. For more information on treating splay leg, check out this article from the Chicken Chick.
To combat the slip of plastic, we line the floor of our brooder with paper towels at first. This allows for little feet to grip, but also absorbs waste. Once the chicks are a few days old we add shavings for more absorption. Adding shavings right away can be a bit too much for little chicks as they are learning to walk since they tend to stumble over the uneven ground. But once they are steady on their feet it’s important to add litter so that they are not standing in their own slippery poop.
Heat
Chicks without a mother hen need a supplemental source of heat. The incubator would have kept the eggs at a consistent 99.5 degrees, similar to what a broody hen would have done. But chicks outside of the egg don’t need it to be quite that warm. Typically a brooder should offer temperatures in the low to mid 90’s for the first couple weeks of life, and then can be slowly decreased to 80’s as the chicks get older. Once chicks are fully feathered (4-6 weeks old) they no longer need supplemental heat.
Naturally, chicks would be able to move to the inside of a huddle under their mother or to the outside of the clutch to maintain their desired temperature. So it’s important to offer them the same options in an artificial brooding environment.
Traditionally, a heat lamp is used to provide a central heat source for new chicks. A 250-watt bulb provides sufficient heat. Be sure to place it in an area of the brooder where chicks can get close to it (but not close enough to burn themselves) for more heat or move out of direct reach of the light to cool off. Since birds do best with light/dark cycles of light exposure, an infrared light allows for consistent heat throughout the day and night without interfering with natural day/night lighting changes.
If you do choose to use a clear light for heat, it’s best to turn it off at night to allow the chicks to rest properly. The problem with this is that turning off the light also removes the heat source.
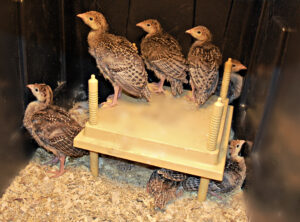
Turkey poults in a brooder using a heating plate. (Almost fully feathered and ready for heat source removal.)
A more recent development in the poultry raising industry is a heating plate, or hover heater. The ones on the market these days are adjustable and provide a warm, covered space similar to a mother hen’s body heat where the chicks can gather to warm up. It also mimics the natural behavior of being able to run in and out from under the heat source, or rest on the edges of the huddle as desired.
Another great attraction for heating plates is that they are safer to use than heat lamps. We’ve all heard the tragic stories of barn fires and other losses that can result from heat lamp accidents, and many people refuse to use them because of the risk they pose. Heating plates are very safe and can even be touched without burning fingers, baby chicks, or other materials. We transitioned to using a heating plate this year and have been really happy with the results. (And so have our birds!)
Walls and ceiling
Setting up an adequate brooding space includes making sure that the area is free from drafts. Wire dog crates or other free-air setups are great for older chicks who have feathers and know how to roost, but small chicks that live on the ground without natural windbreaks can get chilled and die quickly. When needed, we have used cardboard or plastic wrap on the sides of wire brooders to block wind and drafts for young poultry.
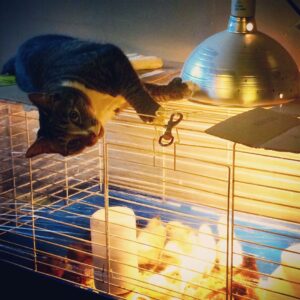
Our house cat watches the chicks closely.
Although chicks can’t jump or fly very high when they are young, they do learn to test their limits within a couple of weeks. The sides of your brooder should be at least 12” high for 1-2 week old chicks and ideally 24” high for 3-4 week old chicks. Anything older than that will need a cover to keep them contained in a brooder. (If you are raising turkey poults or more active fowl it’s best to start with a cover since they learn to jump and fly very early!)
In our case, we have house cats who would love to get their paws on little peeping fluff balls, so we really need to make sure our brooder set up is secure and all angles are protected from reaching and grabbing claws.
This year, we used a large Rubbermaid bin for the bottom and constructed a heavy wooden top with wire shelving access doors for a brooder. It worked great for keeping the chicks safe, warm and clean.
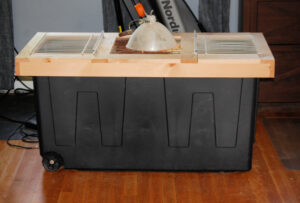
A Rubbermaid bin with a secure, but ventilated, top can work well as a brooder.
Many chicks will also start roosting when sleeping if a proper size/height roost is offered. Sometimes we start with a stick or dowel an inch or two off the ground and raise it as the chicks grow.
Food and water
Of course, you know that chicks will need food and water. One of the cool things about chicks is that they actually have all of the nutrients they need to survive for 2-3 days without food or water after hatching, due to the yolk sac that they absorb in the final stages of development. That’s why hatcheries can ship day old chicks across the country without supplements and they arrive at their destination 2 days later, never even had one bite of food. Pretty impressive, really.
But if you’re hatching chicks at home, they will be more than happy to begin eating and drinking sooner than day 3 of life. Our chicks typically don’t eat or drink much the first day, but by the second day they visit the feeder and waterer regularly.
We recommend free feeding organic chick starter mash to laying or dual purpose chickens until they are about 5 weeks old. (If you are raising broiler chickens there are very different guidelines for feeding that you’ll want to look into.) We typically change our chicks over to poultry grower pellets once they’ve acclimated to being outside, without supplemental heat, and then switch to layer pellets or milled grain mix at 5-6 months old, when they start laying eggs.
My feed of choice is New Country Organics, since their feed is soy free and the chickens love the mixed milled grains. But Green Mountain Feeds also produces a variety of high-quality chicken feeds. You can find more information on why you should raise your chickens organically on our Backyard Chickens page.
Grit is also important to offer to chickens that do not have access to natural ground. Since chickens don’t have teeth, they ingest small rocks (grit) that help them to grind up their food and allow them to digest nutrients. You can buy grit alongside chicken feed, or you can collect gravel from a clean area outside and offer it to them in their enclosure. We offer grit starting at about 2 weeks of age and supplement with ground oyster shells (for added calcium) and table scraps as they get closer to laying age.
Young chicks roosting on a row feeder
Lastly, think about the type of feeder and waterer you want to use. A small bowl will work in a pinch, but chicks will stand (and poop) in open dishes and can easily knock them over and waste feed this way. Row feeders are great for large flocks when many birds need to eat at once, but also tend to be stood (and roosted) on and can be soiled quickly.
Simple gravity feeders available at any farm supply store work well and last for years. It’s a good idea to place these on a brick or other elevated surface to keep them as clean as possible. Be sure to upgrade to larger sizes as the chickens grow so that they do not run out of food or water too quickly.
Good luck in your chicken owning journey and let us know how it’s going for you!


