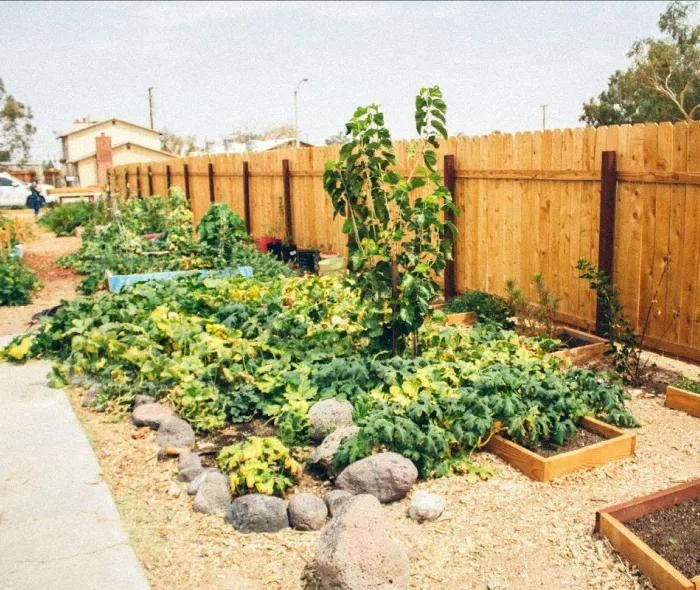
By Richard Robinson, Farmer at Hopestill Farm
Even those of us who are all-in on no-till gardening know weeds will still pop up, and must be controlled. By choosing a hoe that is best suited to the task, you can make light work of this perennial chore. Here are five hoes, and the jobs I use them for.
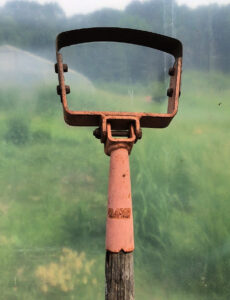
Oscillating hoe, or stirrup hoe
Oscillating hoe
The oscillating hoe, or stirrup hoe, is probably the workhorse of most gardens, for its ability to disturb the soil for the smallest weeds and cut the roots on larger ones. It is double-bladed, so that it cuts on both the push and pull strokes, and the handle-blade joint swings back and forth about 45 degrees, to maximize the cutting angle in each direction. It is dangerous around drip tape, although rotating the shaft a bit so the blade tilts away from the tape allows the vertical part of the stirrup to push the tape out of the way, to avoid cutting it. Over time the blade may become duller, and can be sharpened, although there is little need unless you are cutting a lot of larger weeds. Oscillating hoes come in a variety of sizes; my 5” hoe gets regular use. I have a 3” hoe as well, for tight plantings, but I usually choose the wire hoe instead for those jobs.
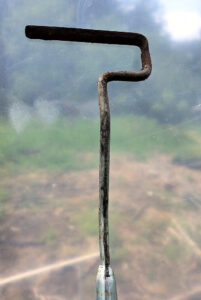
Wire hoe
Wire hoe
The long-handled wire hoe from Johnny’s is one of my favorite tools. It is very light, and so highly maneuverable in tight spaces it’s almost like weeding by hand while standing up. Despite the chisel profile of the blade, this hoe doesn’t cut. It is mainly for disturbing the soil to kill the smallest weeds, especially those at the “thread” stage, when the root is tiny. The heel of the blade can be used to pin and drag out larger weeds. (When dragged through fresh soil, the heel also makes a nice furrow for planting small seeds.) The wire hoe is supreme for weeding around drip tape, as the blade can be slid along underneath the tape without fear of slicing it.
Dutch hoe
Dewit Dutch hoe
There are many different styles of Dutch hoe blade (mine is shaped like a playing-card spade), but they all have in common a flat blade that is pushed and pulled along just under the soil to slice weed roots. I call mine “the shark” for its sub-soil stealth. It does a terrific job on larger roots, cutting them with less effort than the oscillating hoe, but because the blade is mostly hidden, it is tricky to use in tight spots around your plants. I use mine mainly for clearing beds before planting, and cleaning paths. It does work well under drip tape, and so I also use it along my tomato and pepper beds, being careful to stay away from the stems.
Wheel hoe
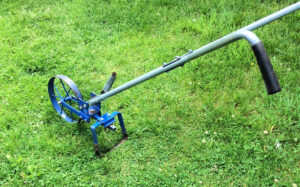
Wheel hoe
The wheel hoe makes short work of large and long spaces, like walking paths and unplanted beds. Most wheel hoes come with an oscillating hoe attachment as standard (8” wide on my Valley Oak wheel hoe, though other sizes are available). This is a gross motor tool; don’t expect to do close cultivation with it. I use mine especially when a bed is getting out of hand, and I need to wipe the slate clean, as it were. The wheel hoe makes such work much easier than the same job with an oscillating hoe. Each of the major brands also offers other attachments; the frame acts as a tool holder for furrowers, hillers, cultivators, and other options. I’ve never tried the two-wheel wheel hoe, which straddles a young crop to kill weeds on either side. One issue with the wheel hoe (and other hoes, for that matter) is the lack of depth control—it’s quite possible to go deeper than you really want to, stirring up weed seeds that could be left buried. (There is a motorized Planet Junior wheel hoe with a depth control; search “Jason Weston” for more information on this antique.)
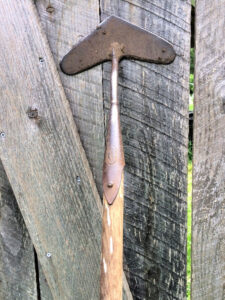
Digging hoe 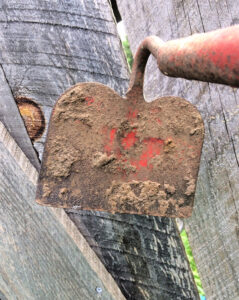
The only hoe many of us knew growing up is the one least suited for garden work. The “garden hoe” features a flat blade more or less perpendicular to the handle, and is virtually useless for controlling weeds. It does a great job of digging, though, and when you need a shallow hole or a deep furrow, this hoe excels. I use mine for planting winter squash. I strike the ground with the blade to make a small divot, pop in 5 seeds, pull the dirt back over, then tamp it down with the flat side of the blade. I’ve made a mark at 3 feet along the handle, and use it to find the spot for the next hole.


