By Christy Bassett, Homesteader at Barefoot All Natural Farm
 Making a pie is a special occasion for me, since we don’t typically eat a lot of refined flour or sweets. But once in a while, a fully homemade dessert is called for to follow a special meal.
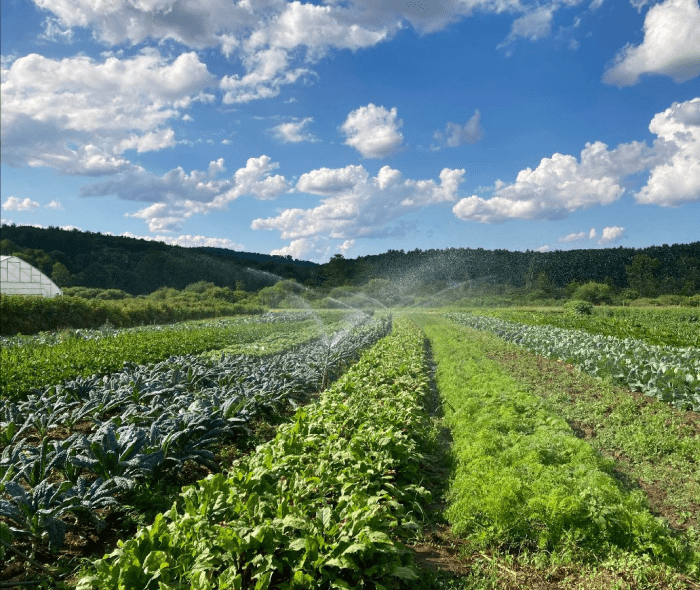
I like to use homemade butter and home rendered lard in my pie crust since we are lucky enough to make those luxuries on our homestead. But even if you don’t have your own dairy cow or pasture-raised pigs, you might want to explore the options near you for sourcing local fat instead of reaching for the shortening.
Once the popular choice for baking with, shortening has recently been put under the magnifying glass by consumers due to the elusive marketing around the ingredients used to make it. Crisco, a name brand shortening, was originally made with cottonseed oil, which was a byproduct of the cotton industry. Since cottonseed oil was not appealing to customers, Crisco hid its ingredient label behind marketing ploys to create feelings of purity and reliability.
“A century ago, Crisco’s marketers pioneered revolutionary advertising techniques that encouraged consumers not to worry about ingredients and instead to put their trust in reliable brands. It was a successful strategy that other companies would eventually copy.” –Smithsonian Magazine
In later years, shortening was made with partially hydrogenated oils, like soybean and canola oils, which contain unhealthy trans fats. Another common ingredient is palm oil, which has detrimental environmental effects from unsustainable harvesting. Check out this video, WTF is Shortening, for an overview of shortening’s history and find out what is exactly in shortening these days. I’ll choose the locally grown and processed lard, thank you.
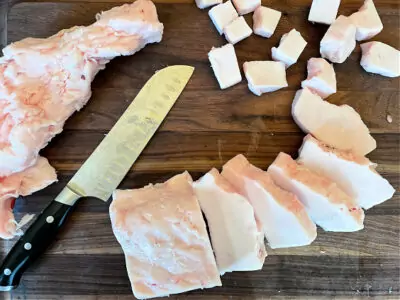
Two types of pork fat: leaf lard on the left and fatback on the right
Lard is starting to make a comeback as a kitchen staple once again, but it still sometimes carries a bit of a reputation as an unhealthy or unpalatable ingredient. This is unfortunate, because lard is a natural one-ingredient fat that can be raised and processed locally. It is made from heating the fat of a pig to the melting point, and then straining the liquid fat from the solid “cracklins”. Lard stores well in the cool temperatures of a root cellar or refrigerator for long periods of time and has a higher melting point than butter, which makes it a good choice for use in baked goods that call for more structure. Fat from pasture-raised pigs is also high in vitamin D due to their daily sun exposure. See this article for other reasons you may want to consider using lard.
Leaf lard (lard made from the internal fat of a pig) is the premium choice for baking since it is a very firm, neutral tasting and smelling fat. But even fatback, when rendered correctly (without overheating), makes lard with little to no flavor and is a versatile fat source that can be used in many recipes. Purchase already rendered lard from a local farm, or buy raw fat from a meat processor for next to nothing and render it yourself. Try a search on NOFA/Mass’s Organic Food Guide to find a source of fat or lard near you.
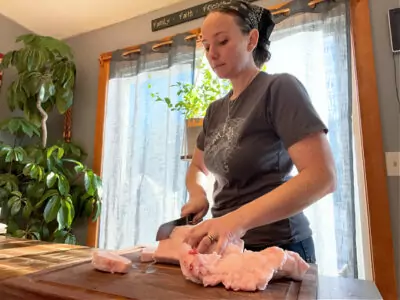
I regularly render pork fat into lard at home, both for cooking and for soapmaking
Using a combination of lard and butter makes for a flaky, but still creamy, flavorful crust that is ideal for both sweet and savory pies. Here’s my recipe–let me know if you have a version that you love too! Email me at [email protected].

Lard and Butter Pie Crust Recipe
Makes two pie crusts
Ingredients:
- 2 cups flour (I use ½ local organic wheat flour and ½ organic white flour)
- 4 Tbs salted butter, cut into small pieces (if using unsalted butter, add 1 tsp salt to recipe.)
- 4 Tbs leaf lard
- 1-2 Tbs ice water, if needed

Directions:
-
- Add flour, butter and lard to a large mixing bowl. Use a pastry cutter to cut the butter and lard into the flour mixture. Continue to mix with the pastry cutter until the mixture becomes coarsely stuck together and dry ingredients are fully incorporated. If needed, add ice water by teaspoonful until the dry ingredients are mixed in and the dough sticks together if pinched. Note: The butter and lard do NOT need to be fully incorporated. It is okay for there to be small chunks of butter or lard still visible at this point. Overmixing can encourage gluten development, which detracts from creating a flaky, tender crust. Only mix until you reach a coarse, non-sticky dough stage.
- Grab a handful of the dough and squeeze it with both hands to form a ball. A ball the size of your palm should make about one crust for an average pie plate. Make larger balls for deep dish pie plates, and smaller balls for shallow dishes.
- Place formed balls in a bowl, cover and refrigerate for at least 1 hour.
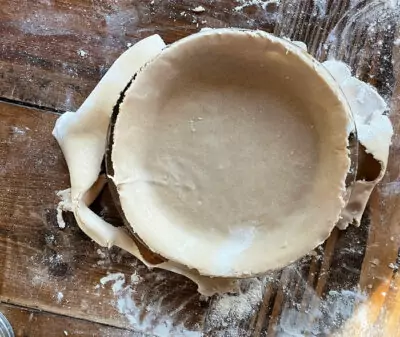
- Remove from the refrigerator and roll out chilled dough balls one at a time with a floured rolling pin on a floured surface. I like to roll pie dough onto floured parchment paper so that I can just flip the crust into the pie plate once it is rolled out. Note: if the dough is too hard to roll without cracking, allow the dough to sit at room temperature for 10-20 minutes, or until it becomes pliable but not soft. If the dough is too soft and breaks apart or the rolling pin rolls through to the table, recreate your dough ball (without kneading) and return to the refrigerator until it firms up.
- Gently place rolled dough into a pie plate. If using parchment paper under the dough, place the pie plate upside down on the dough and then use the underside of the parchment paper to flip your plate and dough right side up.
- Follow with the recipe for your pie. If your recipe calls for a fully or partially cooked pie crust, fill the uncooked crust with pie weights or dried beans and bake at 425° F for 20 minutes or until desired doneness is reached.


